Let's connect!
Molly B Duncan Health Coach
  • Home
  • About
  • Health Coaching
    • FAQ's
    • Testimonials
  • Classes
  • Blog
  • Contact
  • FAVORITES

Clean Out The Fridge Soup

4/8/2020

8 Comments

 
Picture
The other night I posted on my Instagram stories that I was making clean out the fridge soup and it seemed to resonate with people.  This is likely because we're all cooking more due to sheltering in place.  And because we are all cooking more, most of us probably have some leftover veggies wandering around the bottom of the fridge.  Wasting food is never a good idea, but especially not right now when so many people, from farm workers to grocery store employees, are risking their lives to make sure we all have food to eat.  That's where this soup comes in.  It makes use of what's laying about in your fridge.  It's easy.  It's delicious.  And frankly it's more of a formula than a recipe.  As it is a formula, I've broken this down into the base of the soup, the veggies, and the extras.  I hope you make it because it's very nourishing and that's something we could all use now.

Clean Out The Fridge Soup
Serves 4-6

Base:
  • Fat: Please use olive oil.  Thank you.
  • Salt: We have a salt grinder filled with coarse sea salt.  It's less salty than table salt.
  • Black Pepper:  If you can, always use freshly ground black pepper.
  • Spices: Red pepper flakes.  This is personal preference so you can use whatever spices you have to season the soup to make it delicious.  I tend towards less is more.  
  • Onion: whatever you have on hand is fine.  In this soup I used one yellow onion plus three scallions.
  • Garlic: I used four cloves, but this is personal preference.
  • Carrots: I used three medium-sized carrots that we had lying about in the crisper drawer.
  • Celery: I used two stalks of celery.  Whatever you have on hand is fine.  Be sure to use the stalks and the leaves as the leaves add flavor.
  • Broth or water: Use 6 cups of chicken broth or vegetable broth or a combination of broth and water.  Again, we're cleaning out the fridge so use what you have.
  • Base extra: tomato paste or white wine to deglaze the pan before adding the other ingredients.   

Veggies:
  • Honestly, use whatever veggies you have on hand that are headed towards past their prime and haven't been assigned to a particular meal.  In this soup I used two zucchini rolling around the crisper drawer.  This is a good time to use spinach, swiss chard, kale, any squash, peppers, tomatoes, etc.

Extras:
  • Cheese: If you have a Parmesan rind in the fridge, toss it in the soup as it will add a lot of flavor.  Alternatively, you could grate some Parmesan or Pecorino on the soup at the table.
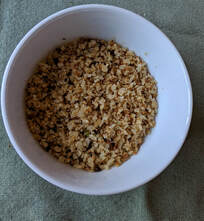
  • Meat: You can tell in the photo above that I added meatballs.  We had some ground pork in the fridge so I rolled it into very tiny meatballs made with just some garlic, salt, and pepper.  You could throw in leftover chicken, Italian sausage, ground turkey or beef, cubed ham, bacon.  Again, use what you have in the fridge that needs to be used so it won't be wasted.
  • Herbs:  If you have thyme, throw a couple of sprigs in.  Some rosemary leaves might be nice.  Garnishing the soup with some chopped parsley at the end will add a touch of color and might even go so far as to remind you of dining in a restaurant.  

Method:
  1. Chop the onion, garlic, celery, and carrot.  
  2. In a 4-quart or larger soup pot or stock pot, heat about three tablespoons of olive oil over medium heat.  Stir in the chopped onion, garlic, celery, and carrot to the pot.  Add a pinch or more of red pepper flakes, 1 teaspoon of salt, and many grinds of black pepper.  Cook until the onion is starting to brown, stirring occasionally to prevent the garlic from burning.  If the pan is looking dry, by all means add another bit of olive oil as it is what an Italian grandmother would do.  
  3. If you are using tomato paste, add 2 to 4 tablespoons (1/4 cup), and stir it around the pan both to mix it with the onions and to cook it.  Cook the tomato paste for one minute. 
  4. If you are using wine, add up to 1/2 cup and stir it around the pan to deglaze it and scrape the brown bits off the bottom of the pot.  
  5. Add the broth or broth-water and stir to combine.  Scrape the bottom of the pan to incorporate the brown bits into the soup.  The bits have a lot of flavor.  Chop any vegetables you are adding, such a squash or a tomato, spinach or chard, and then add them to the soup.  If you are using thyme or rosemary, add them now.  Also, this is the time to add a Parmesan cheese rind if you are using that.  Turn the heat down to low or simmer and put a lid on the pot.
  6. While the soup simmers, this is the time to prepare your meat.  If it's already cooked, then chop it or shred it, whatever is most appropriate.  If the meat needs to be cooked, do that now.  Once the meat is cooked and in bite-sized pieces, add it to the soup. Simmer for an additional five to 10 minutes.  Taste the soup.  What does it need?  It might need some salt.  If it tastes flat, a splash of red wine vinegar or some lemon juice (~2 tablespoons) can brighten it.
  7. Ladle the soup in bowls, and garnish with parsley if you have it.  Serve hot.  

​

8 Comments

Easy Roast Chicken with Root Vegetables

2/17/2020

0 Comments

 
Picture
This delicious and easy chicken recipe was born of malaise.  This winter has had so much rain, no snow (which I was promised by the husband when I agreed to move from California to North Carolina), and frankly very little sun.  To top it off, I got a cold (no fever, congestion, a little fatigue).  I love cooking, but not when I am sick.  So I asked my body what would taste good and be easy to fix and it responded, "Roast chicken with veggies."  Seriously.  And that's how I ended up with this very simple and delicious roast chicken recipe that can be made on a weeknight, but also is good enough for company.  

There are a couple of things you need to know about this recipe.  It calls for a spatchcock chicken, which means the backbone has been removed so the chicken can lay flat.  The chicken will cook more quickly this way.   I always buy a whole chicken and cut the backbone out myself, which Brian then uses with the rest of the bones to make homemade broth.  I can't remember the last time we bought chicken broth at the store.   Some of my local grocery stores sell chicken in spatchcock form so the work is done for you.  If this is not the case for you, and your preferred grocery store has a butcher counter, ask the butcher to remove the backbone for you.  Or watch this video to learn how to do it yourself.  Note: Do not skewer the chicken the way the chef in the video recommends.  It's unnecessary.  You'll need a sharp pair of kitchen shears.    

The other thing I need you to know about this recipe is it employs my new favorite insurance policy against burning the veggies.   Why?  Well, have you ever burned butternut squash?  It smells horrible and is completely inedible.  But hey, I learned not to do it.  And to avoid making the same mistake twice, I put some chicken broth in the bottom of the pan.  This has two benefits.  One, your vegetables will not burn.  Two, both the chicken and the vegetables are very moist using this roasting technique.  Win!  Win!  Yum!  Yum!

Easy Roast Chicken with Root Vegetables
Serves 5-6

1 whole chicken, 4-5 pounds, with backbone removed
5-6 whole parsnips
5-6 whole carrots
1 yellow onion
4-10 cloves of garlic, optional
Good quality extra virgin olive oil
Sea salt
Freshly ground black pepper
3/4 to 1 cup of chicken broth
2-3 sprigs of fresh thyme, optional

​Preheat your oven to 400 F.  

Peel the parsnips and carrots and cut off the ends.  When roasting vegetables, you want the pieces all to be about the same size so they finish cooking at the same time.  Looking at each carrot and parsnip, cut each about where the narrow part begins to widen.  Then take the wide pieces that are left and either cut them in half or in fourths so they are about the same size as the narrow pieces of carrot and parsnip.  Set aside.

Cut off the ends and peel the onion.  Cut the onion in half.  For a medium onion, cut each half into thirds.  For a large onion, cut each half into fourths.  Set aside.  If you are using garlic, peel each clove and leave it whole.  Add the garlic to the onions.  

In a large bowl, toss all the vegetables with 2 tablespoons of olive oil, 1 teaspoon sea salt, and 1/2 to 1 teaspoon of freshly ground black pepper.  Spread in the bottom of a roasting pan (Note: A 9-inch by 13-inch baking pan will work as long as the sides of it are 2.5 inches or higher).  ​Pour the chicken broth over and around the root vegetables to coat the bottom of the pan.  Evenly space the thyme sprigs on top of the vegetables.

Rinse and dry your chicken.  In a small bowl, make a paste of 1-2 tablespoons olive oil, 1 teaspoon sea salt, and 1/2 teaspoon of black pepper.  Either brush or rub this mixture all over the chicken, including between the skin and the meat if you can do that without ripping the skin.  Lay the chicken on top of the vegetables in the roasting pan.

Place the chicken in the oven and roast for 1 hour.  After one hour, the internal temperature of the chicken should be around 165 F.   If it's a little below that, continue to cook in 3 to 5 minute increments.  

To serve, move the chicken to a cutting board.  Cut off the thigh with the leg attached, and then separate the the leg from the thigh.  Slice the breast meat.  On each plate, spoon some vegetables and the pan juices.  Top with the chicken.  Delicious!  Hearty!  Perfect for a cold day or a rainy day or a rainy, cold day.


0 Comments

Seafood Risotto

1/21/2020

4 Comments

 
Risotto is one of those dishes that I find intimidates people.  It need not be this way.  Risotto is time consuming, yes, but it is also very simple.  If you can stir and chop, you can make risotto.  And once you understand the basic ratio of risotto -- 4 parts liquid to one part rice -- you can create a lot of delicious meals.  I find a warm bowl of risotto, loaded with seafood, deeply satisfying, especially during what I call the comfort food months (also known as late fall + winter + early spring).
Picture
I have a couple of tips to set you up for risotto making success.  First, read through the recipe and have all the ingredients prepped and ready to go.  Second, the recipe calls for an onion.  You want to use a yellow onion, often labeled Spanish.  Do not use a sweet onion, please.  The rice and seafood already have sweet notes.  To balance this sweetness, the recipe calls for lemon zest and parsley.   You will need two large pots, one 3-quart or larger pot, and one stock pot or Dutch oven, the kind of pot you would use to make soup or stew.  In the smaller of the two pots, you will boil the seafood to create a seafood stock that will then be used as the liquid in the risotto.  

Seafood Risotto
Serves ~4

1 to 1.25 pounds of frozen or fresh mixed seafood or shrimp*
4 cups water
2-3 tablespoons extra virgin olive oil
1/2 yellow onion, not sweet, diced
1 cup arborio rice
1/2 cup dry white wine
freshly ground salt and pepper
2 lemons, washed, dried, and zested
1/3 cup fresh Italian parsley, chopped
Pecorino cheese, freshly grated, ​optional

*Both Whole Foods and Trader Joe's sell one-pound bags of mixed seafood.  If you are using frozen seafood, defrost it in it's original plastic pouch or in a Ziploc bag in a bowl of warm but not hot water for 60-90 minutes.  If the water has turned cold before the fish is fully defrosted, pour it out and fill the bowl with warm water.  If you are using fresh seafood, especially shrimp, prepare it by deveining it and cleaning it.

Place the seafood, any liquid that has accumulated in the plastic bag the seafood was defrosted in, and the water in a 3-quart or larger pot and heat to a boil on the back burner of the stove.  Once it comes to a simmer or a boil, check the seafood for doneness.  Shrimp, depending the variety, should be pink and firm.  Scallops should be firm but not hard.  Using a slotted spoon remove the seafood from the pot to a bowl and set aside.  Cover the pot with a lid and turn the heat to low.  This is the seafood stock you will use.

Place a Dutch oven or 4-quart or larger pot on the burner in front of the pot holding the seafood stock.  Heat the olive oil over medium-low.  Add the onion and a 1/2 teaspoon each of salt and pepper.  Sauté the onion until translucent.  Add the rice and stir to combine, ensuring the rice is coated with the olive oil.  Stir the rice for one minute to toast it.  Add the wine.  Stir until the rice has absorbed the wine and pot is looking a little dry.  Add one to two ladles of seafood stock to the rice.  Stir frequently until the rice has absorbed most of the liquid.  Again, add one to two ladles of seafood stock.  Stir frequently until the rice has absorbed most of the liquid.  Keep repeating this process until the rice is cooked.  You will know it is done when the risotto looks creamy, not dry, and the rice is still a bit firm, not mushy.  This whole process will take about 20-25 minutes.  

Once the rice is cooked, turn the heat to low.  Add salt and pepper to taste.  Stir in the cooked seafood, the lemon zest, and the parsley.  Cook just until all ingredients are heated through.  Quarter one of the lemons you zested.  Serve the risotto in bowls with a lemon wedge for squeezing over the risotto.  If you serve it with cheese, and an Italian never would do this, sprinkle freshly grated Pecorino over the risotto to taste.  Enjoy!


4 Comments

Roasted Turkey Thighs

12/17/2019

1 Comment

 
Picture
The problem with traditional holiday meals if you are dining solo or with just a few people is that it's a lot of food to make for small numbers.  Brian and I encountered this issue when it was just the two of us this past Thanksgiving.  We wanted some of the traditional foods, but did not want to put in the effort for making a whole turkey dinner when we were setting a table for two people.  What to do?  The answer is to scale down and cook just what you need, which is why turkey thighs are ideal for a small holiday dinner.  Also, unlike a whole turkey, which can sometimes be dry and flavorless in my experience, thighs are moist and oh-so-flavorful!  We served them with wild rice, and the turkey pan drippings spooned over the rice was so good.

Where do you get turkey thighs?  This part may be a little bit tricky.  Sometimes they are readily available in your grocery store.  This was the case when we lived in New York's Hudson Valley.  However, now that we live in North Carolina, we have found that they have to be special ordered from the meat department of our grocery store or procured from a butcher.  And the size of turkey thighs can vary wildly.  One large thigh is usually sufficient for two or more meals.

Hey, before we get to the recipe, let me give you some of the holiday recipes I rely on year after year.
  • This cranberry sauce.  Tip: cut the sugar in half.  You won't miss it.  Also, I've substituted honey with great results.  
  • This butternut squash salad.  I usually serve this with balsamic vinaigrette, substitute pecans for walnuts because I am allergic to them, and skip the cheese.  
  • These green beans in fig vinaigrette.  To be honest, I make this throughout the year.

Roasted Turkey Thighs
Serves 4 or more

2 to 2-1/2 pounds bone-in, skin-on turkey thighs
3 tablespoons melted butter, ghee, or good quality olive oil
2 fresh sage leaves, torn into small pieces
1 teaspoon sea salt
½ teaspoon freshly ground black pepper
1 teaspoon + more poultry seasoning
​1/2 cup water

  1. Preheat oven to 375 degrees.
  2. Brush 9-inch x 13-inch pan with neutral oil such as grapeseed.  This is an insurance policy. 
  3. Pat the turkey thighs dry and place in the pan skin side down.
  4. Mix together the butter (or ghee or oil), sage, salt, black pepper, and one teaspoon of poultry seasoning in a shallow bowl.
  5. Using a pastry brush or your hands, rub the sage mixture all over the turkey thighs, including under the skin.
  6. Place the turkey thighs skin side up.  Take 1-2 teaspoons of poultry seasoning and sprinkle evenly over each thigh.
  7. Pour ½ cup water in the bottom of the pan.  Cover the pan with foil.  Roast the turkey thighs for 30 minutes.  Baste.
  8. Roast for 20 minutes.  Baste.  Remove foil carefully and set it aside..
  9. Roast for another 20-25 minutes until the skin is golden brown and the internal temperature measures 165 degrees.
  10. Remove the turkey thighs from the over, cover with the foil, and let them rest for 10-15 minutes.
  11. Carve into serving pieces or slice.  Spoon the pan drippings over the thighs.  Serve.
​
1 Comment

End of Summer Chicken Mishmash, a recipe

9/23/2019

0 Comments

 
Picture
You may remember that some months ago I got on a kick of throwing a bunch of ingredients in a pan and calling the recipe a mishmash.  There was Spring Vegetable Mishmash and also Salmon Mishmash.  The last of the summer tomatoes brought on the End of Summer Chicken Mishmash.

Actually, no, that's not what brought about this particular mishmash recipe.  What happened was that Brian and I were house hunting across the country and staying in a rental apartment with a kitchen.  The kitchen had the basic necessities of a skillet, a knife, a cutting board, and spatula.  So resourcefulness kicked in as I thought about what we could make easily that would be deeply satisfying and also meet our nutritional needs.  The nearly last of summer cherry tomatoes plus my love of spinach and garlic plus some nice chicken breasts became a hearty dinner one night. 

And boy did we need something nourishing and hearty.  Brian got on the plane with a cold and two days later I had the cold, a doozy that knocked us out.    We still went house hunting and made an offer on a house while hopped up on cold medicine.  Please note, I do not recommend extremely large purchases while under the influence of Nyquil.

End of Summer Chicken Mishmash
(or Rental Apartment Chicken Mishmash)
Serves 4

1 to 1.25 pounds of chicken breast or chicken cutlets cut into 1-inch cubes
2 Tablespoons extra virgin olive oil
1 large yellow onion, diced
pinch of red pepper flakes
4-6 cloves of garlic, peeled and minced
2-4 cups of raw spinach, roughly chopped
1 to 1.5 cups of cherry tomatoes, halved (or if very large then quartered)
Sea Salt
Freshly ground black pepper
Cooked brown or white rice to accompany.

Heat the olive oil over medium heat in a 12-inch skillet until it shimmers.  Add the chicken and cook until light brown on one side, about three to four minutes.  Season with salt and pepper.  Turn the chicken cubes over and cook two to three minutes longer.  Remove the chicken from the pan.  If it looks like the pan is dry, swirl in some more olive oil.  Add the onion and cook over medium heat until it starts to turn light brown, stirring often to avoid burning.  This step can take up to 10 minutes.  Stir in the garlic and cook for one minute.  Add the tomatoes, season with a pinch or two of salt and pepper, and cook until they are starting to break down, about five minutes.  Add the spinach and cook until it starts to wilt.  Add the chicken to reheat it.

To serve, spoon rice into four bowls and then divide the chicken mishmash between the four bowls.  Serve warm.


​
0 Comments

Vietnamese Inspired Chicken with Broccoli

8/22/2019

0 Comments

 
Picture
When I first had to give up gluten in order to save my health, I thought I would have stay away from Asian food forever.  Why?  Because I told myself a story that all Asian food, regardless of country of origin had soy sauce in it, and soy sauce has wheat in it.  In fact, there are a lot of Asian sauces that have wheat in them.  The upside is that I discovered gluten free tamari which is wheat-free soy sauce.  Also, I've learned to read food product labels really carefully.   Still, though, I never go out for Asian food for fear of being cross-contaminated, and we very rarely make it at home.  This past spring, though, I ate at a Vietnamese restaurant on a visit to see my mother in Arizona and was reminded how much I miss the flavors of various Asian cuisines.  

I was inspired to create something simple I could make at home as I am rediscovering how to take the dishes of various Asian countries, especially China and Vietnam, and make them gluten free and safe for me to eat.  With that, I present to you this very simple and delicious meal of grilled chicken with broccoli which you can easily make on a weeknight.  You'll need to do a little advance planning as the chicken needs to be marinated.  Also, if you are vegetarian or vegan, the broccoli is worth making because it's so easy and so flavorful that I eat straight out of the pan when I take it out of the oven.

Vietnamese Inspired Chicken with Broccoli
Serves 4

1.25 to 1.5 pounds of boneless, skinless chicken thighs
1/4 cup reduced sodium tamari (or soy sauce if you don't need to be gluten free)
2 teaspoons honey
1 tablespoon coconut oil, melted
1/2 teaspoon fish sauce, optional (I prefer Red Boat, which is gluten free)
pinch of red pepper flakes
3-4 cloves of garlic, peeled and minced
1/2 teaspoon five spice powder
Grapeseed oil for grilling chicken
~ 1 pound of broccoli, washed and cut into florets (I use the precut bagged broccoli from Trader Joe's)
2 tablespoons extra virgin olive oil
1 teaspoon sea salt
A couple of grinds of fresh black pepper

First, marinate the chicken, which can be done in as little as one hour before grilling to as long as overnight.  Place the chicken thighs in a pie plate or square glass baking dish.  In a bowl, whisk together the tamari, honey, coconut oil, fish sauce, red pepper flakes, garlic, and five spice powder.  Pour the marinade over the chicken, cover, and refrigerate.  If you are marinating the chicken longer than an hour, be sure to turn the chicken over halfway through the marinating time.

Second, get ready to cook the broccoli and the chicken.  For the broccoli, preheat the oven to 400.  In a bowl, toss the broccoli with the olive oil, salt and pepper.  Spread the broccoli on a baking sheet lined with parchment paper or lightly oiled.  Bake for 25-30 minutes.

While the broccoli is baking, you have two choices for cooking the chicken: grilling or roasting.  To roast, place the chicken on a baking sheet, either lined with parchment paper or lightly oiled, and place it in the oven with the broccoli, 15 minutes before the broccoli is finished baking.  This way, the chicken and the broccoli will finish cooking at the same time.

To grill the chicken, light your gas grill on high and then turn it down to low or medium-low.  Take the chicken out of the marinade and brush it with grapeseed oil.  Grill the chicken for five and a half minutes on each side.  Serve with the broccoli.   
​

0 Comments

Grilled Fish with Coconut Rice & Tropical Salsa

7/9/2019

0 Comments

 
Picture
We've entered that part of summer when using the oven is off-limits and when our bodies are craving lighter foods.  This meal of grilled fish and coconut rice is one of our summer standards.   It's fairly easy and fairly quick.  You can do it on a Tuesday night when things are busy.  It can easily be scaled to feed more people should you wish to have folks over for dinner, as we did this past Sunday.  All the flavors play nicely together from the coconut in the rice to the mango in the salsa.  You want to pick a mild fish for this dinner so that the taste of it doesn't compete with the rice and salsa.  Choose a salsa with tropical fruit in it, such as mango and/or pineapple, so it will play nicely with the coconut rice.  And the coconut rice is delicious with grilled chicken or grilled shrimp, too.  Enjoy!

Grilled Fish with Coconut Rice and Tropical Salsa
Serves 4

1 tablespoon coconut oil
1 cup brown basmati rice (we like the Trader Joe's brand)
2 cups unsweetened unflavored coconut water
1 pound of mahi mahi fillets, or other mild white firm-fleshed fish*
Salt and pepper
Olive oil
Tropical salsa of your choice (we like the Island Salsa and the Pineapple Salsa from Trader Joe's)

*You want a firm fish so it doesn't fall apart on the grill or when being taken off the grill.  
​

In a 2-quart saucepan, melt the coconut oil over medium heat.  Add the rice and stir to coat with the coconut oil.  Just when the rice is starting to brown, add the coconut water.  It will make a loud hissing sound.  Cover and bring to a boil.  Once boiling, turn down to low and cook covered for 40 minutes.

While the rice cooks, preheat your gas grill to medium.  Pat the fish fillets dry.  Brush the fish with oil so it does not stick to the grill.  Season the fish with salt and pepper.  When the grill is preheated, turn it to low, and grill the fish according to thickness.  For thin fillets, a couple of minutes per side should do it.  For thicker fillets, at least 1/2-inch thick, three to four minutes per side.

When the rice is finished, remove the pan cover and check for doneness.  Fluff with a fork.  Serve with the grilled fish and pass the salsa at the table.  
0 Comments

Why celebrating is good for your health

5/20/2019

0 Comments

 
Picture
Baby me with my beautiful mother, who taught me the importance of celebrating.

It is a privilege to be alive.  I'm celebrating my birthday this month.  This idea of being alive, of it being a privilege, has been driven home to me in recent weeks.  Every school shooting, every kid who will never reach the age of 40, their loss of life makes me keenly aware how lucky I am to be alive.

And I am glad that this feeling of gratitude for being alive is present right now because I also am battling a bit of depression.  If you've been depressed or you are depressed, I see you.  I see the way depression can pop out of nowhere and hold your head under water, zap your energy, and make you feel like you have nothing to look forward to.  Frankly, the way our culture is making hatred a norm these days, I've been feeling very sad lately.  So I am carrying both the gratitude of being alive and the sadness that comes with depression.  And that's OK.

I have written about and spoken about how gratitude is actually helpful in creating happiness and therefore is good for your health.  It turns out that celebrating is also good for your health.  I have come across many studies and articles about how celebrating enhances your happiness, improves your ability to live in the moment, and makes it easier to handle life's challenges.  That's just three of the many positive benefits.  I also have learned through my training to become a coach as well as during my time as a coaching client that what we celebrate expands.  It's one of the reasons that when I am coaching clients I always ask them what they are celebrating, remind them that no achievement is too small or too big to celebrate, and use it as a tool to reinforce that they are making positive progress in support of achieving their goals. 

It also turns out that celebrating is an antidote to depression.  When you consistently celebrate, you feel more optimistic.  One of the things I really love about my marriage is that Brian and I cheer each other on and celebrate one another's victories as if they were our own.  

In my experience, what prevents us from celebrating our achievements and experiences is the belief that we do not deserve to do this or that it is an act of ego.  Please let go of that false myth!  You are worth celebrating.  In fact, I'd love to hear in the comments below what you are celebrating these days!

Here is a celebration mantra for you from Erin Stutland, author of Mantras in Motion, "When I celebrate myself, I raise my value."  Please celebrate yourself and the people around you.  It's good for your health!

Sources:
https://greatergood.berkeley.edu/article/item/10_steps_to_savoring_the_good_things_in_life
https://www.psychologytoday.com/us/blog/imperfect-spirituality/201512/why-you-should-celebrate-everything
https://www.inc.com/bill-carmody/3-reasons-celebrating-your-many-accomplishments-is-critical-to-your-success.html


0 Comments

Roasted Cauliflower Rice

4/17/2019

0 Comments

 
Picture

"What do you do to keep the riced cauliflower from tasting like a slightly solid form of boiled water?"  This is a message from my friend Marci after she read my recipe for Spring Vegetable Mishmash.  I've been swapping out cauliflower rice for regular rice recently as I have evidence that consuming rice too often has led to some recent autoimmune flare-ups.  Cauliflower rice is also popular with people who follow a Whole30 or a Paleo diet or an autoimmune protocol.   I definitely feel better after eating cauliflower rice versus eating traditional rice.  

However, Marci's question brought up a good point and that is cauliflower rice can sometimes taste like just a bunch of wet styrofoam pebbles.  Frankly, food should taste good, especially healthy food.  Through trial and error, I have found that roasting cauliflower rice produces the most flavor.  It's an easy cooking method and takes as much or less time to make as traditional rice.  

Here are the ingredients for it, if you are not starting with a whole head of cauliflower, plus what it looks like spread in the pan:

Picture
Picture
Roasted Cauliflower Rice
Serves 3-4

One large head of cauliflower or 16-ounces of riced cauliflower
2 Tablespoons of grapeseed oil, avocado oil, or coconut oil (melted)

Preheat your oven to 425 F.  Brush a baking sheet with the oil.  

If you are using a whole head of cauliflower, wash it, cut off the lower stem and all leaves.  Cut it into eight parts. Place in the bowl of a food processor with the blade attachment. Pulse 10 times for 5-10 seconds until the cauliflower is reduced to very small chunks.  

Spread the cauliflower on the prepared baking sheet.  Bake for 10 minutes. Remove from the oven.  Stir the cauliflower so the bits browning on the edges are well incorporated back into the middle.  Spread so the cauliflower is evenly distributed.  Bake for another 10 minutes or so until some of the cauliflower is becoming golden brown. You’ll notice that roasting the cauliflower rice has caused it to shrink.  

Use as a base for any dish that calls for rice.  

Nutritional awesomeness: A half cup of cooked cauliflower is an excellent source of Vitamin C, even after accounting for Vitamin C loss during the cooking process (source).  For a better understanding of how the cooking process can alter the nutrient content of fruits and vegetables click here.
0 Comments

Spring Vegetable Mishmash, a recipe

3/29/2019

0 Comments

 
Picture

Can you have too many mishmashes?  I know I posted this salmon one last month, but I am finding a medley of ingredients both comforting and healthy.  The other night I made this using vegetables that are finally appearing in the market as we transition from winter to spring: fresh peas, arugula, and, here in southern California, even zucchini.  It has so much flavor, so much bang for the buck, so much green beauty in one meal!  Plus, it's easy.  If you've read my blog for any length of time, you know I am a big fan of ease.

The inspiration for this recipe came from this risotto recipe.  BUT risotto requires a lot of hands on attention, all that stirring and whatnot.  So I thought about how I could make something equally as delicious, equally as nutritious, and eliminate all the stirring.  That is how you have come to find yet another mishmash recipe on my blog.  It's worth it, though, so very worth it.  And if you drink wine, I can attest to the fact that a Sauvignon Blanc plays nicely with this mishmash.  


​Spring Vegetable Mishmash
Serves 4

Good quality olive oil
Salt and fresh ground black pepper
1 small yellow onion or 2 shallots, finely chopped
3-4 cloves of garlic, peeled and minced
1 to 1.5 pounds of zucchini, washed, ends trimmed, cut into a large 1-inch pieces
1 cup of fresh (or frozen peas)
3 to 4 cups of arugula or spinach, washed and chopped
2 cups of cooked white rice, brown rice, or cauliflower rice
Juice of 1/2 lemon
Salt and freshly ground pepper
Feta or Parmesan cheese, optional
Pine nuts, toasted, optional

In a 12-inch skillet or sauté pan, cook the onions and garlic in two tablespoons of olive oil over medium heat until the onion is translucent, about five minutes or so.  Add the zucchini and cook until nearly tender.  Stir infrequently so that the zucchini has a chance to become light golden brown on the outside.  Cooking the zucchini will take a good 10-15 minutes.  When the zucchini are crisp tender (in other words, not mushy), add the peas and the arugula or spinach.  Cook until the arugula is wilted and peas and just cooked through, another five minutes or so.

In the meantime, heat your cooked rice or cauliflower rice.  Once the veggies are done cooking, put 1/3 cup to 1/2 cup of rice in the bottom of a shallow bowls, top with a spoonful of veggies, season with salt and pepper to taste, and add a sprinkle of any toppings you desire.  

Make it vegan: Eliminate the cheese.  

​Play with the veggies: Instead of 1.5 pounds of zucchini do 1/2 pound of asparagus cut into one-inch lengths and one-pound of zucchini.  Add the asparagus to the pan at the same time as the zucchini and continue to follow the directions.
 

Nutritional awesomeness: Zucchini has a lot of nutritional benefits, which you can read about here.  It's a good source of Vitamin A and potassium (source).   Arugula is an excellent source of Vitamin K, which is essential for proper blood clotting. 

​

0 Comments
<<Previous
Forward>>

    Author

    Hi friends!  I am Molly.  Welcome to my blog where I share my creations and adventures to help you create a life you love.  I am passionate about food, travel, and health! Thanks for stopping by and looking around.  All photos are taken by me unless otherwise attributed.  I develop and write all my recipes with attribution for inspiration and ideas where applicable.  All of my recipes are gluten free.  

    Archives

    August 2021
    June 2021
    April 2021
    March 2021
    December 2020
    November 2020
    October 2020
    June 2020
    May 2020
    April 2020
    February 2020
    January 2020
    December 2019
    September 2019
    August 2019
    July 2019
    May 2019
    April 2019
    March 2019
    February 2019
    January 2019
    November 2018
    October 2018
    September 2018
    August 2018
    July 2018
    June 2018
    May 2018
    April 2018
    February 2018
    January 2018
    December 2017
    October 2017
    September 2017
    August 2017
    July 2017
    June 2017
    May 2017
    April 2017
    March 2017
    February 2017
    September 2016
    August 2016
    July 2016
    June 2016
    May 2016
    April 2016
    March 2016
    February 2016
    January 2016
    December 2015
    November 2015
    October 2015
    September 2015
    August 2015
    July 2015
    June 2015
    May 2015
    April 2015
    March 2015
    February 2015
    January 2015

    Categories

    All
    Breakfast
    Dessert
    Dinner
    Exercise & Fitness
    Gluten Free
    Healthy Living
    Healthy Snacks
    Healthy Travel
    Quick
    Recipes
    Side Dishes
    Skin Care
    Sugar Addiction
    Vegan
    Web Wellness Wednesdays
    Women's Health

    RSS Feed

    Subscribe to our mailing list

    * indicates required
    Your data is used in line with our privacy policy.
Health Coaching
Classes
Contact
FAQ
Terms and Conditions
​Disclaimer
Privacy Policy
© COPYRIGHT Molly B Duncan.
​ ALL RIGHTS RESERVED.
Photos used under Creative Commons from Brett Jordan, roseannadana